Thinking about cooling just the rooms you actually use? Installing a mini-split AC system is a smart move. A mini-split system gives you precise zone control, so you’re not wasting energy on empty spaces. Unlike central air, there’s no need for ductwork, which honestly makes the whole process less of a headache.
If you go with a reputable company like Leo Kob Co., you’ll get honest work and a fair price. They genuinely care about matching the system to your home’s needs. Folks in Elizabethtown, Lancaster, Harrisburg—really, all over South Central PA—have seen how a well-installed mini-split can make a real difference in comfort.
Mini-split systems often qualify for rebates, which is a nice bonus. But to get those savings (and make sure your system lasts), proper installation is key. Here’s what you should know about the process and why a mini-split might be the best fit for your place.
Understanding Mini Split AC Systems
Mini split AC systems have become a go-to for keeping homes cool and comfortable, especially if you want to skip the hassle of ducts. You get to control each room individually. If you’re curious about how they work, or wondering which type is best, a little research goes a long way.
How Mini Split ACs Work
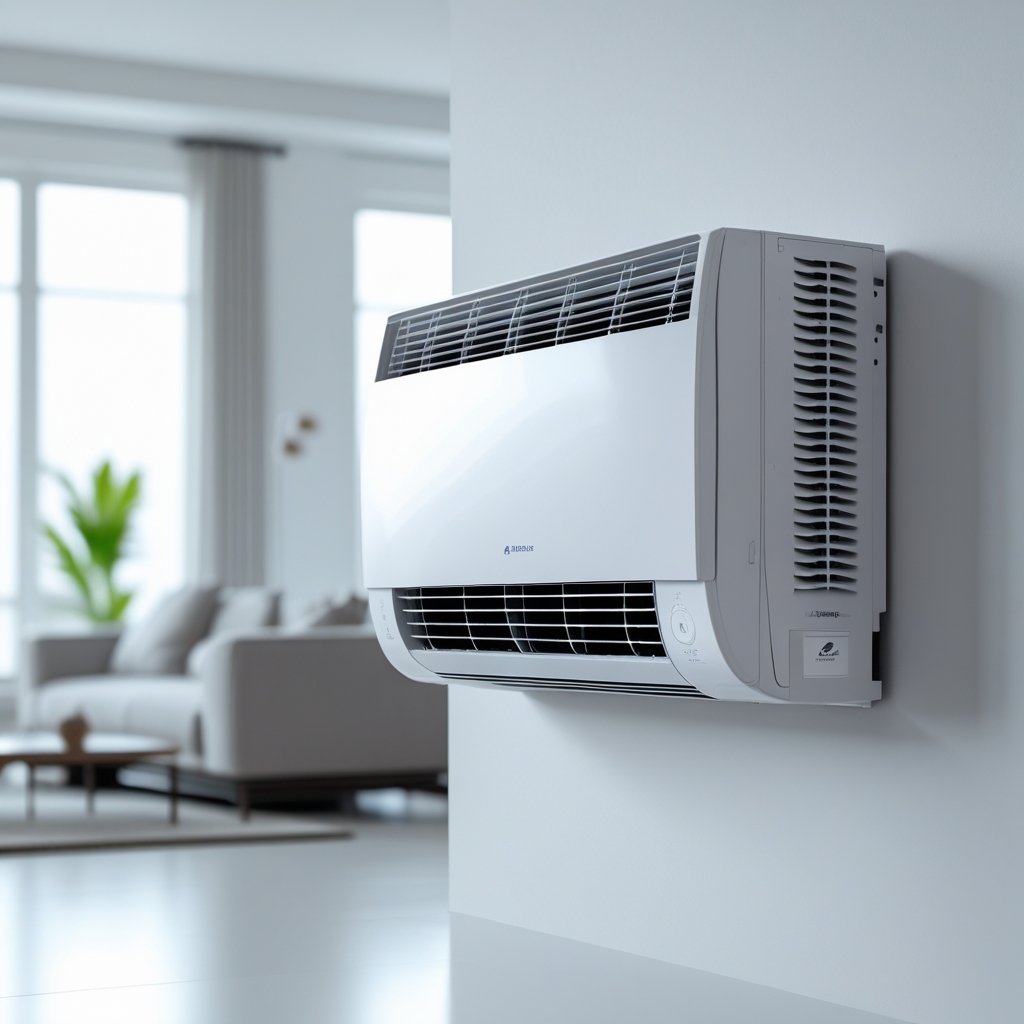
A mini split AC system is made up of two main components: an outdoor compressor and one or more indoor air handlers. The outdoor unit pulls heat from inside your house and dumps it outside. The indoor units push cool air right where you need it.
The indoor air handlers connect to the compressor by small refrigerant lines—no big, ugly ducts required. That means you can cool just the rooms you want, instead of blasting the whole house. It’s more efficient and gives you better control.
Mini splits use inverter tech, so they adjust their power to keep the temperature steady. Since there’s no ductwork, these systems are perfect for homes that just aren’t set up for traditional AC.
Benefits of Mini Split Systems
There’s a lot to like about mini splits, honestly.
- Energy Efficiency: Only cool the spaces you’re actually in, so you don’t see sky-high bills.
- Easy Installation: No ducts means less mess and a faster setup.
- Quiet Operation: Most indoor units are so quiet, you’ll barely notice them.
- Zone Control: Set different temps in different rooms—no more thermostat battles.
- Improved Air Quality: Many models have filters that help cut down on dust and allergens.
At Leo Kob Co., we help people all over South Central PA figure out which mini split fits their budget and needs. Plus, local rebates can make these systems even more affordable.
Types of Mini Split AC Units
You’ve got three main options:
- Single-Zone Units: One outdoor compressor, one indoor air handler. Great for a single room.
- Multi-Zone Units: One outdoor compressor, multiple indoor air handlers. Perfect for several rooms or the whole house.
- Heat Pump Mini Splits: Do both heating and cooling, so you’re covered all year.
Depending on your space, Leo Kob Co. can help you pick what works. Multi-zone systems are flexible, but single-zone setups are simpler and usually cheaper.
Getting the right size and type for your rooms is important. If you’re not sure, a professional can help make sure you don’t end up with high bills or weird hot spots.
Planning Your Mini Split AC Installation
If you want your mini split AC to work well, you’ll need to pick the right system, pay attention to your space, and figure out the best spots for everything. Good planning now saves headaches later.
Choosing the Right Mini Split System
Start with your cooling and heating needs. You want something that fits your rooms—not too small, not overkill. Features like quiet modes or energy-saving settings can make a difference, too.
Look for ENERGY STAR models to trim down your electric bill. Decide how many zones you want to control—single-zone for one room, or multi-zone for several.
Leo Kob Co. can help you sort through options based on your home’s layout and your wallet. Get the right size and features from the start, and you’ll avoid uneven cooling or unexpected costs.
Assessing Room Size and Layout
Mini splits only work well if they’re sized right. Measure your room’s square footage to estimate the BTUs you’ll need. Too small? It’ll struggle. Too big? You’ll waste energy and money.
Think about ceiling height, windows, insulation, and what you use the room for. Sun-filled rooms or ones with lots of appliances might need more cooling power. Open layouts might need more than one indoor unit.
Write down your measurements and room details, or have a pro come check things out. It’s worth the extra step to make sure you get the best results.
Selecting the Best Installation Location
Mount the indoor unit where air can move freely—don’t stick it behind furniture or curtains. High on the wall works best, since cold air drops and warm air rises.
Steer clear of heat sources or direct sunlight, so your unit doesn’t have to work overtime. For the outdoor compressor, find a shaded, well-ventilated spot that’s easy to reach for maintenance.
A professional installer from Leo Kob Co. will make sure everything’s wired and mounted safely, following code and keeping things tidy.
Pre-Installation Preparation
Before you start, gather your tools and get the installation area ready. A little prep makes the whole job smoother.
Gathering Necessary Tools
You’ll want a few basic tools handy:
- Cordless drill with bits
- Stud finder
- Level
- Measuring tape
- Pipe cutter
- Wrench set
- Vacuum pump for refrigerant
- Nitrogen regulator (for flushing lines, if needed)
- Electrical tester
- Screwdrivers (flathead and Phillips)
Check your tool kit before you start. Glance over the installation manual for any special gear you might need. Nothing’s worse than getting halfway through and realizing you’re missing something.
Preparing the Installation Site
Pick a spot for the indoor unit where air can move and you can easily run lines to the outside. Keep it away from heat and sunlight. Clear out the workspace—inside and outside—so you’re not tripping over stuff.
Make sure the wall is strong enough to handle the unit’s weight. You might need anchors or a mounting bracket for extra support. Plan a short, straight route for refrigerant lines, the drain hose, and wiring.
If you’re unsure about anything, Leo Kob Co. can help with site checks and tool prep to make sure your mini split works as it should.
Installing the Indoor Unit
Mounting the indoor unit right is crucial. You’ll need to secure it to the wall and make an opening for the line set that links it to the outdoor condenser.
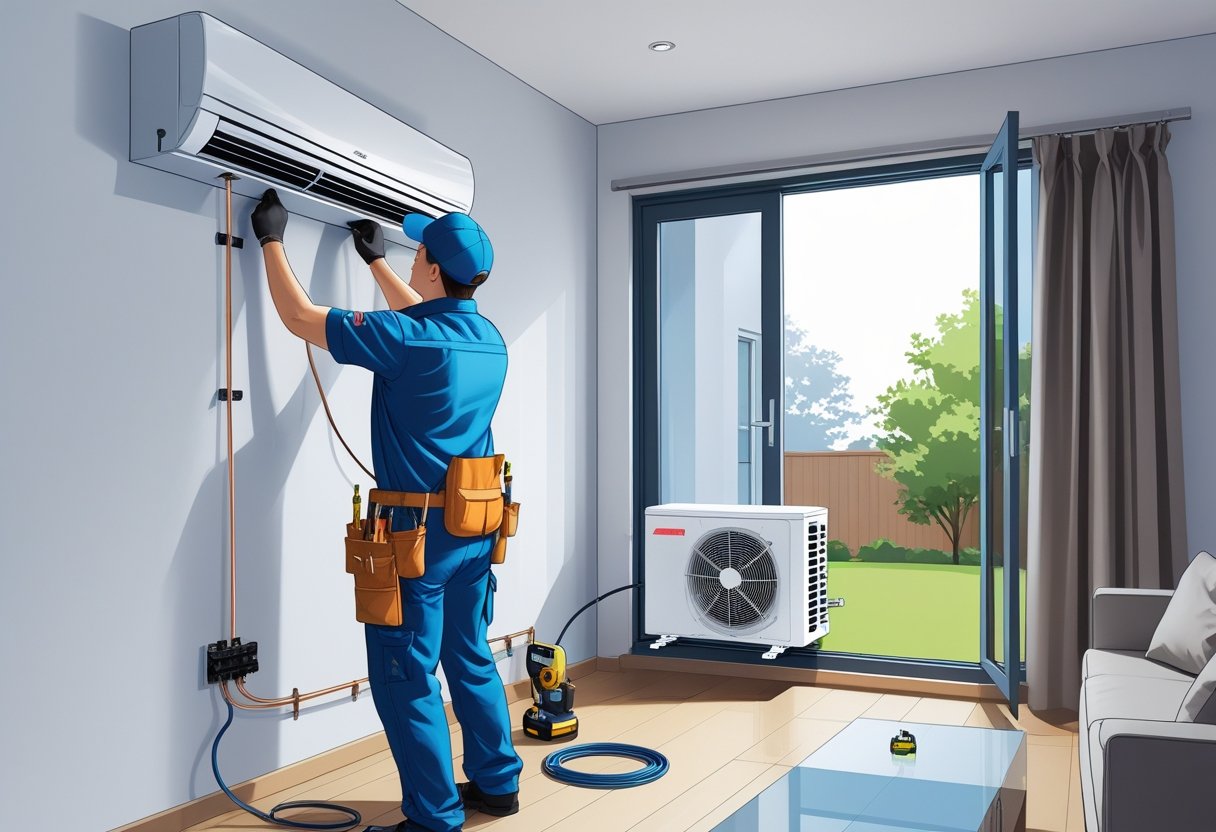
Mounting the Unit on the Wall
Find a sturdy wall that can support the indoor unit. Avoid spots with lots of moisture or direct sun. Use a level to keep the mounting plate straight.
Attach the plate with solid anchors or screws. It needs to be snug to avoid rattling or noise. Leave some room above for airflow and future service.
Once the plate’s up, hang the indoor unit carefully. Make sure it sits flush and steady—it’s not just about looks, but performance, too.
Drilling the Hole for Line Set
You’ll need to drill a hole through the wall near the indoor unit for the refrigerant lines, drain, and wiring. Aim for 6 to 8 inches above the floor for good drainage.
Use a 3-inch hole saw bit. Angle the hole slightly downward from inside to outside, so water drains away from your wall.
Smooth out the edges and seal around the hole with insulation to block drafts and pests. A tight seal keeps your system efficient and your house protected.
Leo Kob Co. techs always suggest taking your time here—better safe than sorry.
Setting Up the Outdoor Condenser
Getting the outdoor condenser set up right is a big deal. Where you put it and how you secure it will affect how well your system runs and how long it lasts.
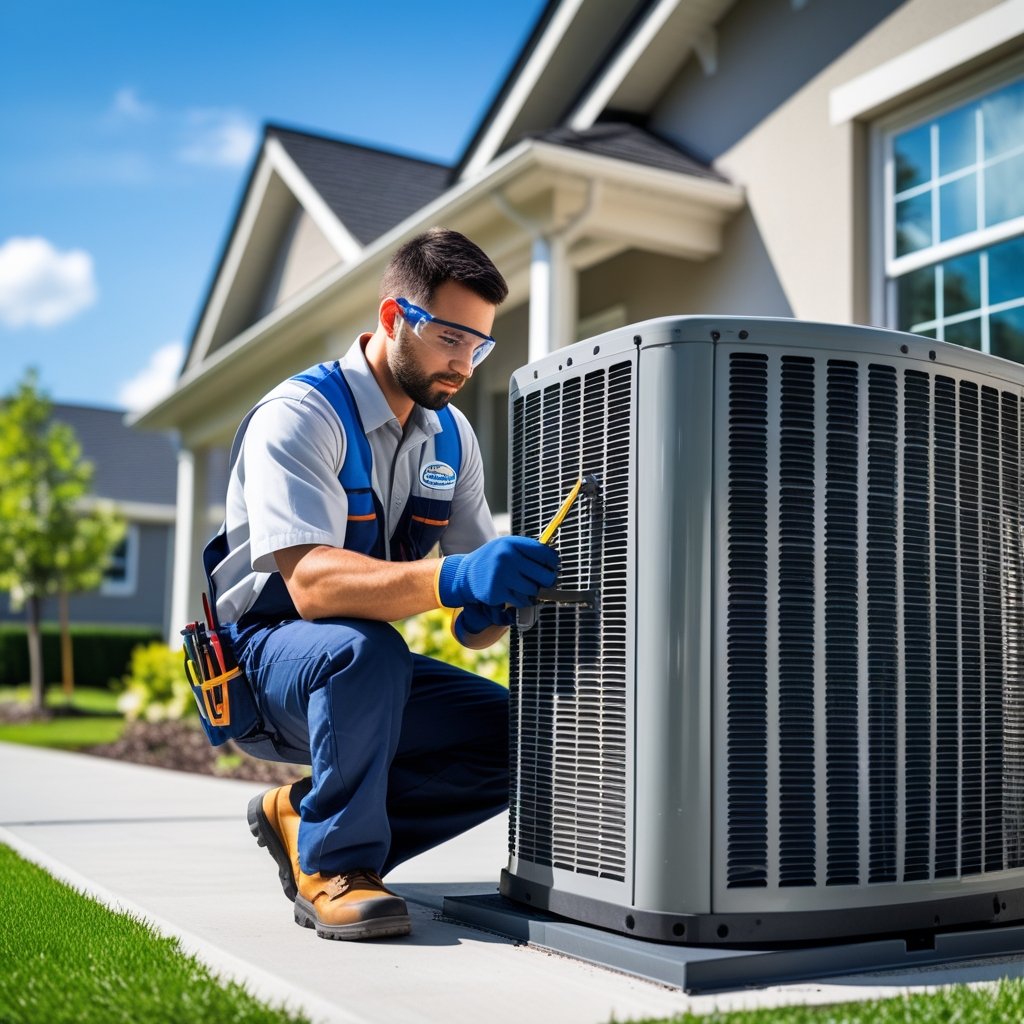
Positioning the Outdoor Unit
Pick a spot with good airflow, away from direct sun and debris. Set the condenser on a flat surface—concrete pad or strong brackets both work. Leave at least 24 inches of clearance around it for ventilation.
Don’t put it near noisy equipment or anywhere water pools up when it rains. Make sure you can get to it for maintenance. In South Central PA, keep snow and ice in mind—sometimes a little elevation helps.
Securing the Unit Properly
Once you’ve picked the spot, bolt the condenser down so it can’t shift or rattle when the wind picks up. Use anchor bolts or heavy-duty brackets, whatever matches your model. Tighten all screws and fittings to cut down on noise and wear.
If you’re putting it on soft ground, go with a concrete slab or rubber pads to reduce vibration and protect against rust. Leo Kob Co. always sticks to the manufacturer’s instructions to keep your warranty safe.
Connecting Electrical and Refrigerant Lines
Wiring and refrigerant lines are the backbone of your mini-split AC setup. Do it right, and your system runs safely and efficiently. You’ll run electrical cables, install the line set, and prep the system to start cooling.
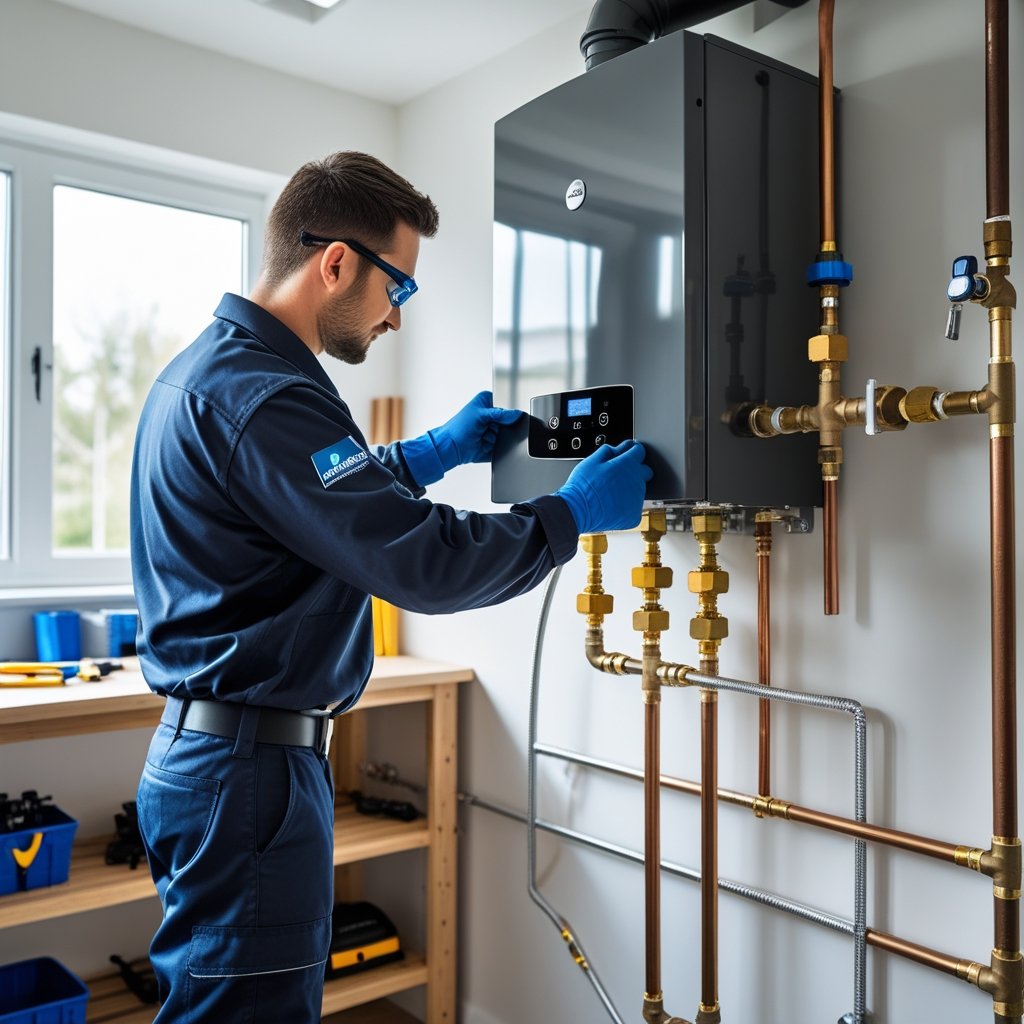
Running Electrical Wiring
Power for your mini-split comes from a dedicated circuit at your panel. Start by running conduit or cable from the disconnect box to the outdoor unit. Use the right gauge wire and follow local codes—no shortcuts here.
Inside, connect the wiring between the indoor and outdoor units for both power and communication.
Always shut off power before you touch any wires. If you’re not confident, call in a licensed electrician. Better to be safe than sorry.
Installing the Line Set
The line set—two copper tubes, one high pressure and one low—moves refrigerant between the units. Run the tubes through your wall, keeping them short and straight to avoid leaks or poor performance.
Hold the lines in place with brackets or clamps. Insulate the suction line well to boost efficiency and prevent condensation, which can lead to problems down the road.
Vacuuming and Charging the System
After you’ve got the lines hooked up, you need to vacuum out air and moisture. Any leftover air or water can wreck your compressor and kill your cooling power.
Use a vacuum pump to pull a deep vacuum in the refrigerant lines. Take your time—this step matters.
Then, charge the system with the right amount of refrigerant, usually measured on a scale. Too much or too little can cause trouble, so accuracy is important.
Leo Kob Co. techs follow these steps carefully to keep your mini-split humming along, especially in Pennsylvania’s changing seasons.
Sealing and Insulating Connections
If you want your mini split AC to keep working well, don’t skip on insulating the refrigerant lines and sealing up any wall gaps. This stops energy loss and helps prevent issues like condensation or drafts.
Insulating Refrigerant Lines
The refrigerant lines carry hot and cold between your indoor and outdoor units. If you don’t insulate them, you’ll lose efficiency and risk moisture problems.
Slip closed-cell foam insulation sleeves over the lines. Cut them to fit—gaps are the enemy.
Tape the seams tight with HVAC foil or vinyl tape to block moisture and air. The insulation should fit snug, not squished, to keep things running right and prevent corrosion.
It’s a small detail, but it pays off—better energy use, quieter operation, and fewer headaches later.
Sealing Wall Passages
The pipes and cables for your mini split have to go through your walls to connect the indoor and outdoor units.
Use a good exterior-grade caulk or expanding foam to seal up these wall passages. That’s your best bet for blocking drafts, pests, and moisture from sneaking in.
Check both inside and outside your home for any gaps. Even small openings can let in bugs or cause your energy bills to creep up.
A tight seal boosts your AC’s efficiency and protects your walls from water damage. Leo Kob Co. can walk you through these steps, making sure your installation actually meets local standards and holds up over time.
Testing and Starting Up Your Mini Split AC
After you’ve got your mini split installed, it’s time to see if everything works as it should. That means turning it on, checking that it cycles properly, and setting your preferred temperature.
Verifying System Operation
Flip on your mini split and listen up—any weird noises? The indoor unit should start blowing cool air after a minute or two. Take a look at both the indoor and outdoor units to make sure nothing’s rattling or shaking.
Feel around the connections for any air leaks and double-check that the refrigerant lines are tight. Try out the remote or wall panel and see if it powers the system on and off. If you’ve got more than one zone, test each one by itself.
Check the thermostat display and see if it matches the actual room temperature. Got issues? Don’t wait—give a local service like Leo Kob Co. a call and they’ll sort it out.
Adjusting Temperature Settings
Getting the temperature right saves energy and keeps your place comfortable. Start with something moderate, like 74°F in summer. Cranking it too low just makes the system work overtime and drives up your bill.
Switch between cooling, heating, or auto depending on the season. You can also play with fan speeds—faster cools quicker, but uses more power.
A lot of mini splits let you schedule temperature changes. Set it to ease off when you’re out or asleep.
Every so often, check and recalibrate the thermostat if things feel off. It’s a simple way to avoid wasted energy and extend your system’s life. Plus, your wallet will thank you for it. Learn more about maintenance here.
Maintenance Tips for Optimal Performance
Keeping your mini split in good shape helps it run better and last longer. Regular cleaning, leak checks, and prepping for the seasons go a long way. These habits can help you dodge expensive repairs and save on energy.
Regular Cleaning
Filters and the outdoor unit collect dust and debris fast. Check and clean filters every 2 to 4 weeks if you’re using the system a lot. Usually, you can just pop them out and rinse with warm water. Make sure they’re dry before you put them back.
Don’t forget the outdoor unit. Clear away leaves, dirt, or anything else that could block airflow. Clean coils mean your system won’t have to work as hard to heat or cool.
If you’re not sure about cleaning coils or deeper parts, Leo Kob Co. can help with regular maintenance.
Checking for Leaks
Leaks in the refrigerant lines can sap your mini split’s power. Watch for weaker airflow or odd noises. Take a look at the lines and connections for any oily spots or damage.
If you spot something weird, call in a pro to check for leaks. Refrigerant issues cut efficiency and shorten your system’s life.
Catching leaks early keeps your mini split running right and saves money in the long run. Don’t just shrug off small signs—sometimes that’s all it takes to avoid bigger headaches.
Seasonal Maintenance Tips
Before summer or winter, schedule a basic tune-up. This covers refrigerant levels, electrical connections, and making sure controls work. Seasonal checks help prevent breakdowns when you need your AC most.
If you live where winters get rough, keep the outdoor unit clear of ice and snow. A cover helps, but take it off before you run the system again.
Seasonal upkeep keeps things running smooth year-round. Leo Kob Co. has maintenance plans in South Central Pennsylvania that make it easy and affordable.
Troubleshooting Common Installation Issues
When you’re installing a mini-split, you might hit a few snags. Most of the time, it’s something with wiring, refrigerant, or airflow. Knowing what to look for helps you fix things faster.
Electrical problems are a big one. Loose wires or bad connections can keep the system from turning on or make it shut off for no reason. Double-check all wires and make sure breakers aren’t tripped.
Low refrigerant means weak cooling. If the system feels off or airflow is spotty, you could have a leak. You’ll need a pro to handle that.
Sometimes airflow just stinks because of dirty filters or bad placement of the indoor unit. Make sure filters are clean and nothing’s blocking the vents—no curtains, no furniture in the way.
Here’s a quick checklist for troubleshooting:
IssueWhat to CheckTipNo power or system offWiring connections, breaker statusReset breakers carefullyWeak coolingRefrigerant leaks, dirty filtersSchedule a refrigerant checkUneven airflowIndoor unit placement, blocked ventsClear obstructions and clean filters
If you’d rather not mess with it, Leo Kob Co. has been handling mini-split installs and troubleshooting in South Central PA since 1904. Their team’s got the know-how to keep your system humming.
Frequently Asked Questions
Installing a mini-split AC system is more than just hanging a unit on the wall. You’ll have to think about where it goes, costs, and whether you want to DIY or hire a pro. There are rules to follow, and a few quirks to be aware of too.
What steps are involved in the installation of a mini-split AC and heat unit?
An expert will size up your space and suggest the right system size. Then they’ll set up the outdoor and indoor units, connect refrigerant lines and wiring, and test everything for proper heating and cooling.
What should I consider when installing a mini-split air conditioner on an internal wall?
Check that the wall can handle the unit’s weight. Leave enough space around it for airflow. Think about how you’ll run the refrigerant lines and wiring from inside to outside—sometimes that’s trickier than it looks.
Is it a DIY-friendly project to install a mini-split AC system, or should I hire a professional?
You could try mounting the indoor unit yourself, but the full install needs skill. Handling refrigerants and electrical work? That’s for certified folks with the right tools. Pros make sure it’s safe and up to code.
How much can I expect to pay for professional mini-split AC installation services?
The price depends on the system and how complicated the job is, but you’re usually looking at anywhere from $2,000 to $5,000 for a typical home. That covers equipment, labor, and any needed electrical upgrades. Leo Kob Co. gives you fair, upfront pricing—no surprises.
Are there any legal considerations to be aware of when installing a mini-split AC system on my own?
Yep, you need to follow local building codes and pull the right permits. Only licensed techs can handle refrigerants by law. Always check with your local authorities before you get started.
What potential downsides should I be aware of before deciding to install a mini-split system?
Mini-splits usually cost more upfront than window units, which can be a bit of a sting if you're watching your budget. The indoor units aren't exactly invisible—they hang on your walls, and honestly, not everyone loves that look. If the installation isn't done right, you'll probably notice the system doesn't run as efficiently, and you might end up dealing with repairs that really shouldn't have happened. You'll want to keep up with maintenance, too, or things can go downhill faster than you'd expect.